How to Print Screen on Mac: A Comprehensive Guide
Printing a screen on a Mac, also known as taking a screenshot, is a handy feature that allows users to capture images of their screen for various purposes. Whether you want to save an important document, capture a funny meme, or troubleshoot an issue, knowing how to print screen on Mac can be incredibly useful. In this comprehensive guide, we’ll explore different methods for taking screenshots on a Mac and provide step-by-step instructions for each method.
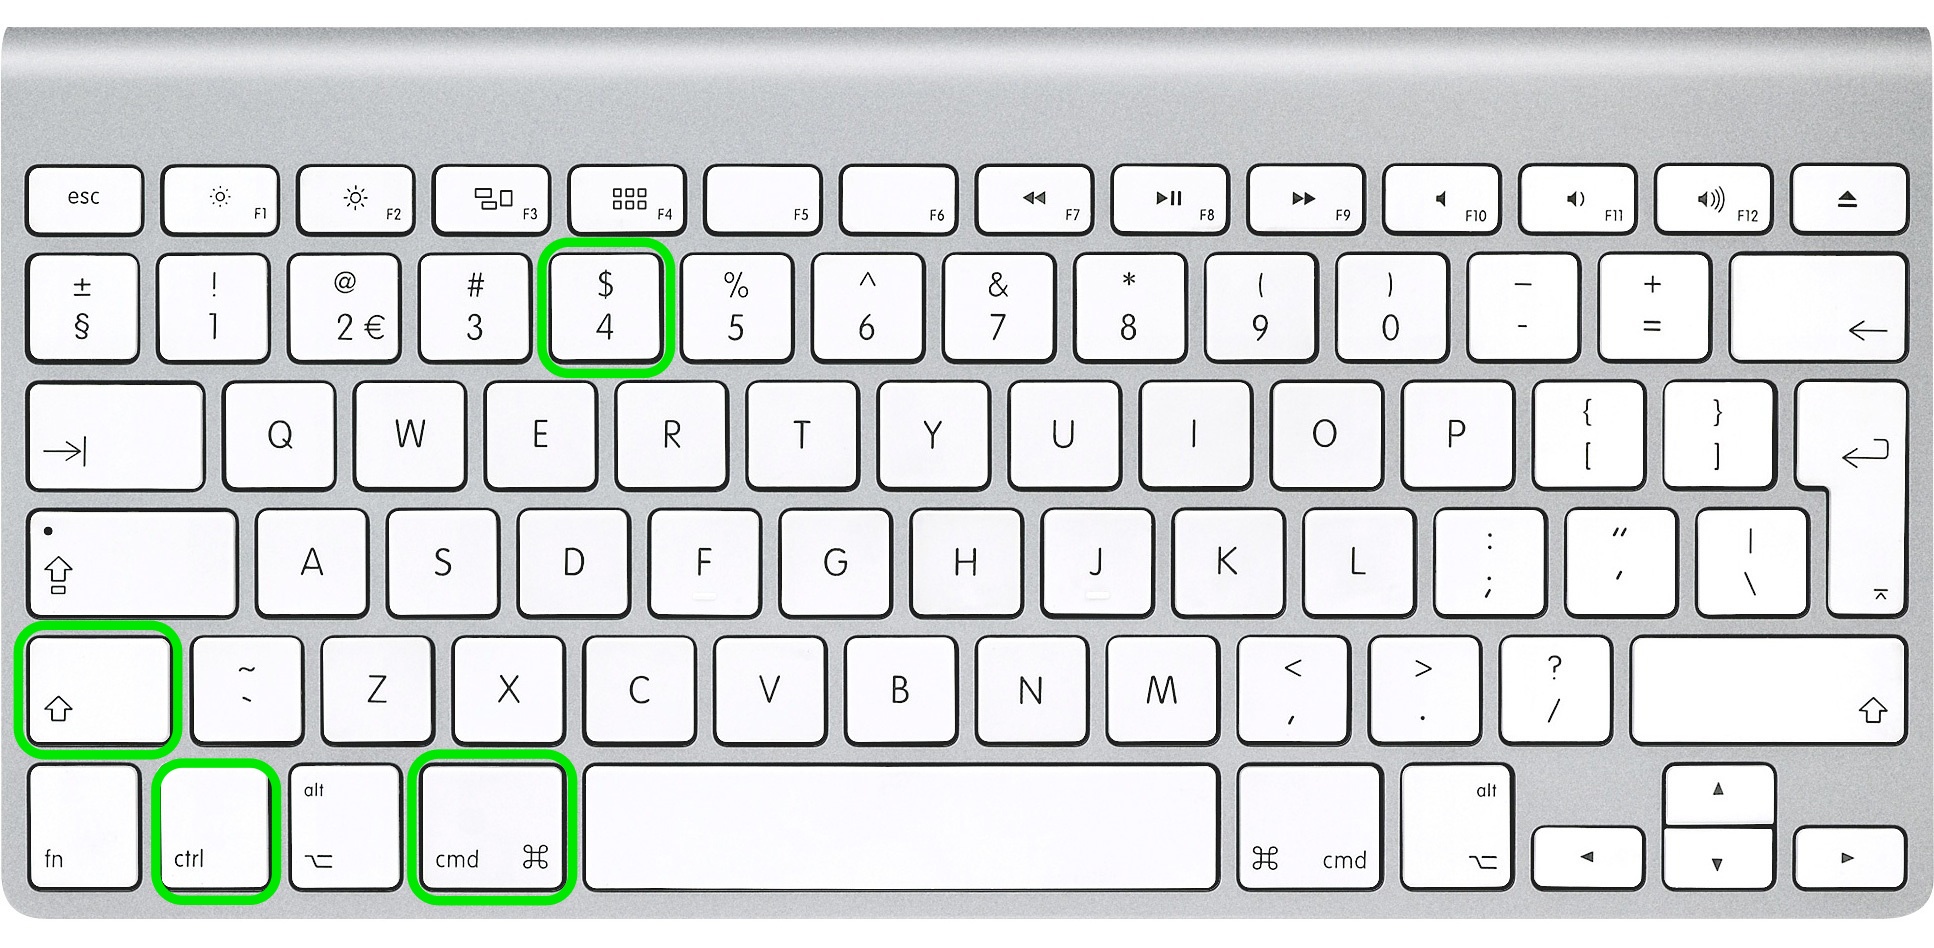
Method 1: Using Keyboard Shortcuts
- Capture the Entire Screen: To capture the entire screen on your Mac, press and hold down the following keys simultaneously: Command (?) + Shift + 3. You’ll hear a camera shutter sound, indicating that the screenshot has been taken. The screenshot will be saved as a file on your desktop by default.
- Capture a Selected Portion of the Screen: If you only want to capture a specific portion of the screen, press and hold down the following keys simultaneously: Command (?) + Shift + 4. Your cursor will change to a crosshair. Click and drag to select the area you want to capture. Release the mouse button to take the screenshot. Again, you’ll hear a camera shutter sound, and the screenshot will be saved as a file on your desktop.
- Capture a Specific Window: To capture a specific window on your Mac, press and hold down the following keys simultaneously: Command (?) + Shift + 4, then press the Spacebar. Your cursor will change to a camera icon. Click on the window you want to capture. The screenshot will be saved as a file on your desktop.
Method 2: Using the Screenshot Utility
- Open the Screenshot Utility: You can also use the Screenshot utility on your Mac to capture screenshots. To open the utility, press Command (?) + Shift + 5. This will open the Screenshot toolbar at the bottom of your screen.
- Choose Capture Options: In the Screenshot toolbar, you’ll see options to capture the entire screen, a selected portion, or a specific window. Click on the appropriate icon to select your desired capture option.
- Customize Settings: You can customize settings such as where to save the screenshot, set a timer, or choose whether to show the mouse pointer in the screenshot.
- Capture the Screenshot: Once you’ve selected your capture options, click on the Capture button (a camera icon) to take the screenshot.
- Access Screenshots: After capturing the screenshot, it will appear as a thumbnail in the bottom-right corner of your screen. You can click on the thumbnail to edit or share the screenshot, or drag it directly into a document or application.
Conclusion
Taking screenshots on a Mac is a straightforward process that can be done using keyboard shortcuts or the Screenshot utility. Whether you need to capture the entire screen, a selected portion, or a specific window, there’s a method to suit your needs. By mastering the art of printing screen on Mac, you can easily capture and share images of your screen for various purposes, making it a valuable tool for productivity, communication, and troubleshooting.