Scanning Documents on a Printer: A Step-by-Step Guide
In today’s digital age, scanning documents has become an essential task for businesses and individuals alike. Whether you need to create digital copies of important paperwork or share documents electronically, knowing how to scan documents on a printer is a valuable skill. In this guide, we’ll walk you through the process step by step, ensuring you can easily digitize your documents whenever the need arises.
Step 1: Prepare Your Document
Before you start scanning, make sure your document is properly prepared. Remove any staples, clips, or bindings that could obstruct the scanning process. Straighten out any creases or folds to ensure a clean scan without distortions. If your document is multiple pages, organize them in the correct order to avoid confusion later on.
Step 2: Turn on the Printer
Ensure that your printer is turned on and properly connected to your computer or network. Most modern printers have a dedicated scanning function accessible either through physical buttons on the device or via a touchscreen interface.
Step 3: Place the Document on the Scanner Bed
Open the scanner lid or document feeder, depending on the type of scanner your printer has. Place the document face down on the scanner bed, aligning it with the designated markers or guides to ensure proper positioning. Close the scanner lid gently to prevent any movement of the document during scanning.
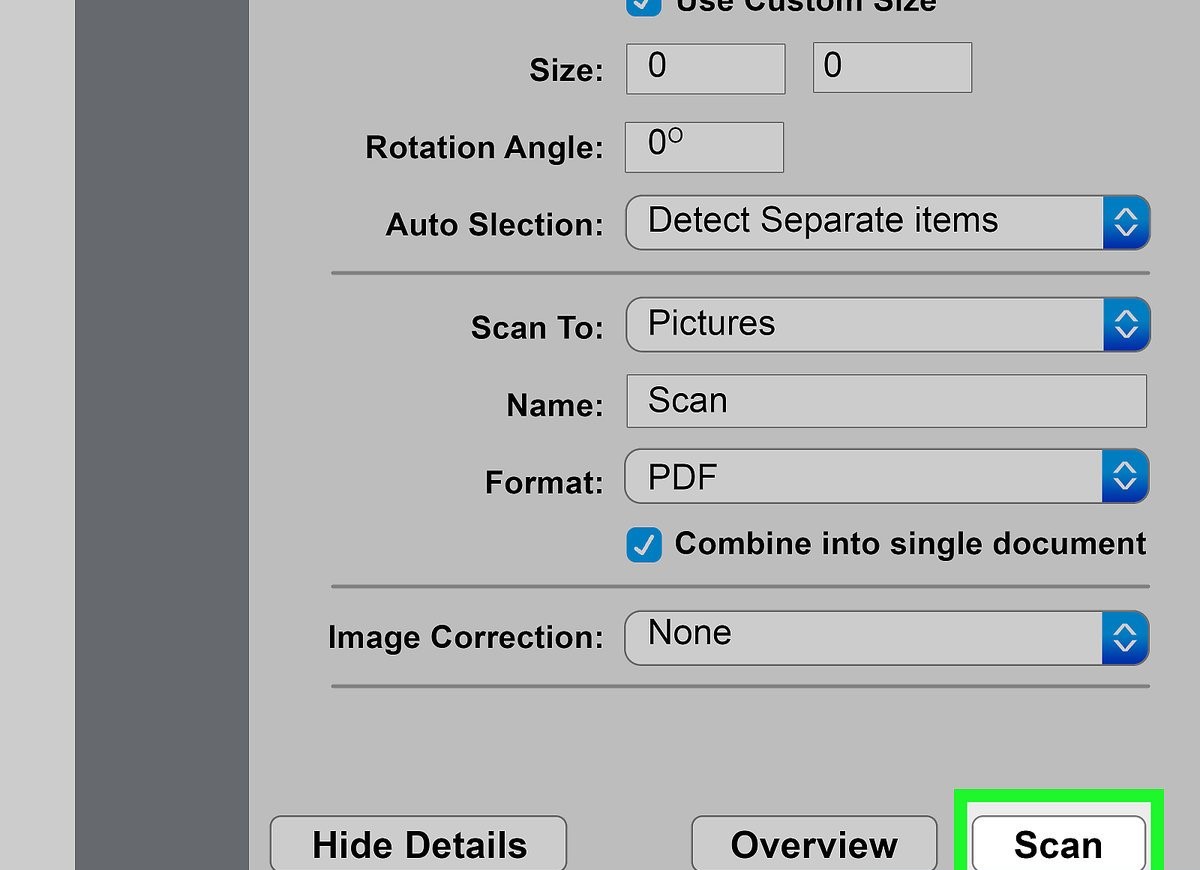
Step 4: Select Scanning Options
On the printer’s control panel or touchscreen interface, navigate to the scanning function. Here, you’ll typically find options such as scan resolution, color mode, and file format. Choose the appropriate settings based on your specific requirements. For most documents, a standard resolution of 300 DPI (dots per inch) in black and white or grayscale mode suffices, but adjust as needed for higher quality or color scans.
Step 5: Initiate the Scan
Once you’ve configured the scanning options, initiate the scan by pressing the designated button or selecting the “Scan” option on the printer’s interface. The printer will begin scanning your document, capturing the image and converting it into a digital file.
Step 6: Save or Send the Scan
After the scanning process is complete, you’ll typically have the option to save the scanned document directly to a connected computer or network drive. Alternatively, you can choose to send the scan via email or store it on a USB flash drive, depending on the capabilities of your printer. Select the desired destination and follow any on-screen prompts to complete the process.
Conclusion
Scanning documents on a printer is a straightforward process that enables you to create digital copies of physical paperwork with ease. By following the simple steps outlined in this guide, you can quickly and efficiently digitize your documents whenever necessary. Whether you’re archiving important records, sharing information with colleagues, or organizing your personal files, knowing how to scan documents on a printer empowers you to manage your documents more effectively in today’s digital world.